How to Enable HTTP/2 in Apache 2.4 on Ubuntu 20.04
January 11, 2022
HTTP/2 came into our lives in 2015, giving us a reduction in page load times along with a whole bunch of new features like multiplexing, header compression, and server push just to name a few of the benefits of HTTP/2.
HTTP/2’s not only offers a new compression format but proved to be resilient against header compression attacks such as CRIME (which stands for “compression ratio info-leak made easy”), but as a binary protocol, it automatically safeguards us against attacks inherent with text-based protocols. But thee best partof it all is that all major client browsers and servers extend support to HTTP/2, and W3Techs reports that 46.9% of websites are using the protocol as of December 2021.
Benefits of Using HTTP/2
- Server push: Server will pro-actively sent components to clients, so clients doesn’t need to wait for sending requests to server.
- Multiplexing: Reducing number of active connection by bundling multiple HTTP requests from client and sent to server.
- Encryption: Efficiently use to encryption with TLS protocol in HTTP/2 over HTTP/1.1.
- HTTP header compression: Compressed headers will reduce the overhead of additional requests to web server also more mobile-friendly thanks to the header compression feature.
- SEO: Faster web performances which consequently lead to better SEO ranking.
This article will help you to enable HTTP/2.0 in Apache web server on CentOS / Red Hat/ Debian and Ubuntu systems.
Prerequisites
Before installing you should already have install Apache and PHP on your instance. Ensure that you are running Apache 2.4.17 or above because HTTP/2 is supported from this version and upwards. Check Apache version using this command on your terminal console.
apache2 -v
In Ubuntu 20.04 you will get an output similar to the one below.
Server version: Apache/2.4.41 (Ubuntu)

Server built:   2022-01-05T14:49:56
Once you met the prerequisites next, enable the HTTP/2 module on Ubuntu by running the following command.
sudo a2enmod http2
Next, locate and edit your SSL virtual host file, if you’ve enabled HTTPS using Let’s Encrypt, a new file is created with a le-ssl.conf suffix.
sudo nano /etc/apache2/sites-enabled/your-domain-name-le-ssl.conf
Insert the directive below after the <VirtualHost *:443> tag.
Protocols h2 http/1.1
Hit CTRL+X followed by Y and ENTER to save and close the file.
Restart Apache for the changes to take effect.
sudo systemctl restart apache2
Configure Apache to use HTTP/2 for PHP
By default Apache uses the mod_php module, we need to switch to PHP-FPM. This is because the mod_php module uses the prefork MPM module which is not supported by HTTP/2. So we will need to uninstall the prefork MPM and switch to the mpm_event module which will be supported by HTTP/2.
Since the PHP 7.4 mod_php and prefork MPM module is use, both will need to disable as shown:
sudo a2dismod php7.4

sudo a2dismod mpm_prefork
After disabling the modules, next, enable the Event MPM, Fast_CGI, and setenvif modules as shown.
sudo a2enmod mpm_event proxy_fcgi setenvif
Next, install and start PHP-FPM as shown.
sudo apt install php7.4-fpm

sudo systemctl start php7.4-fpm
Then enable PHP-FPM to start at boot time.
sudo systemctl enable php7.4-fpm
Finally, enable PHP-FPM as Apache’s PHP handler and restart the Apache web server for the changes to be effected.
sudo a2enconf php7.4-fpm

sudo systemctl restart apache2
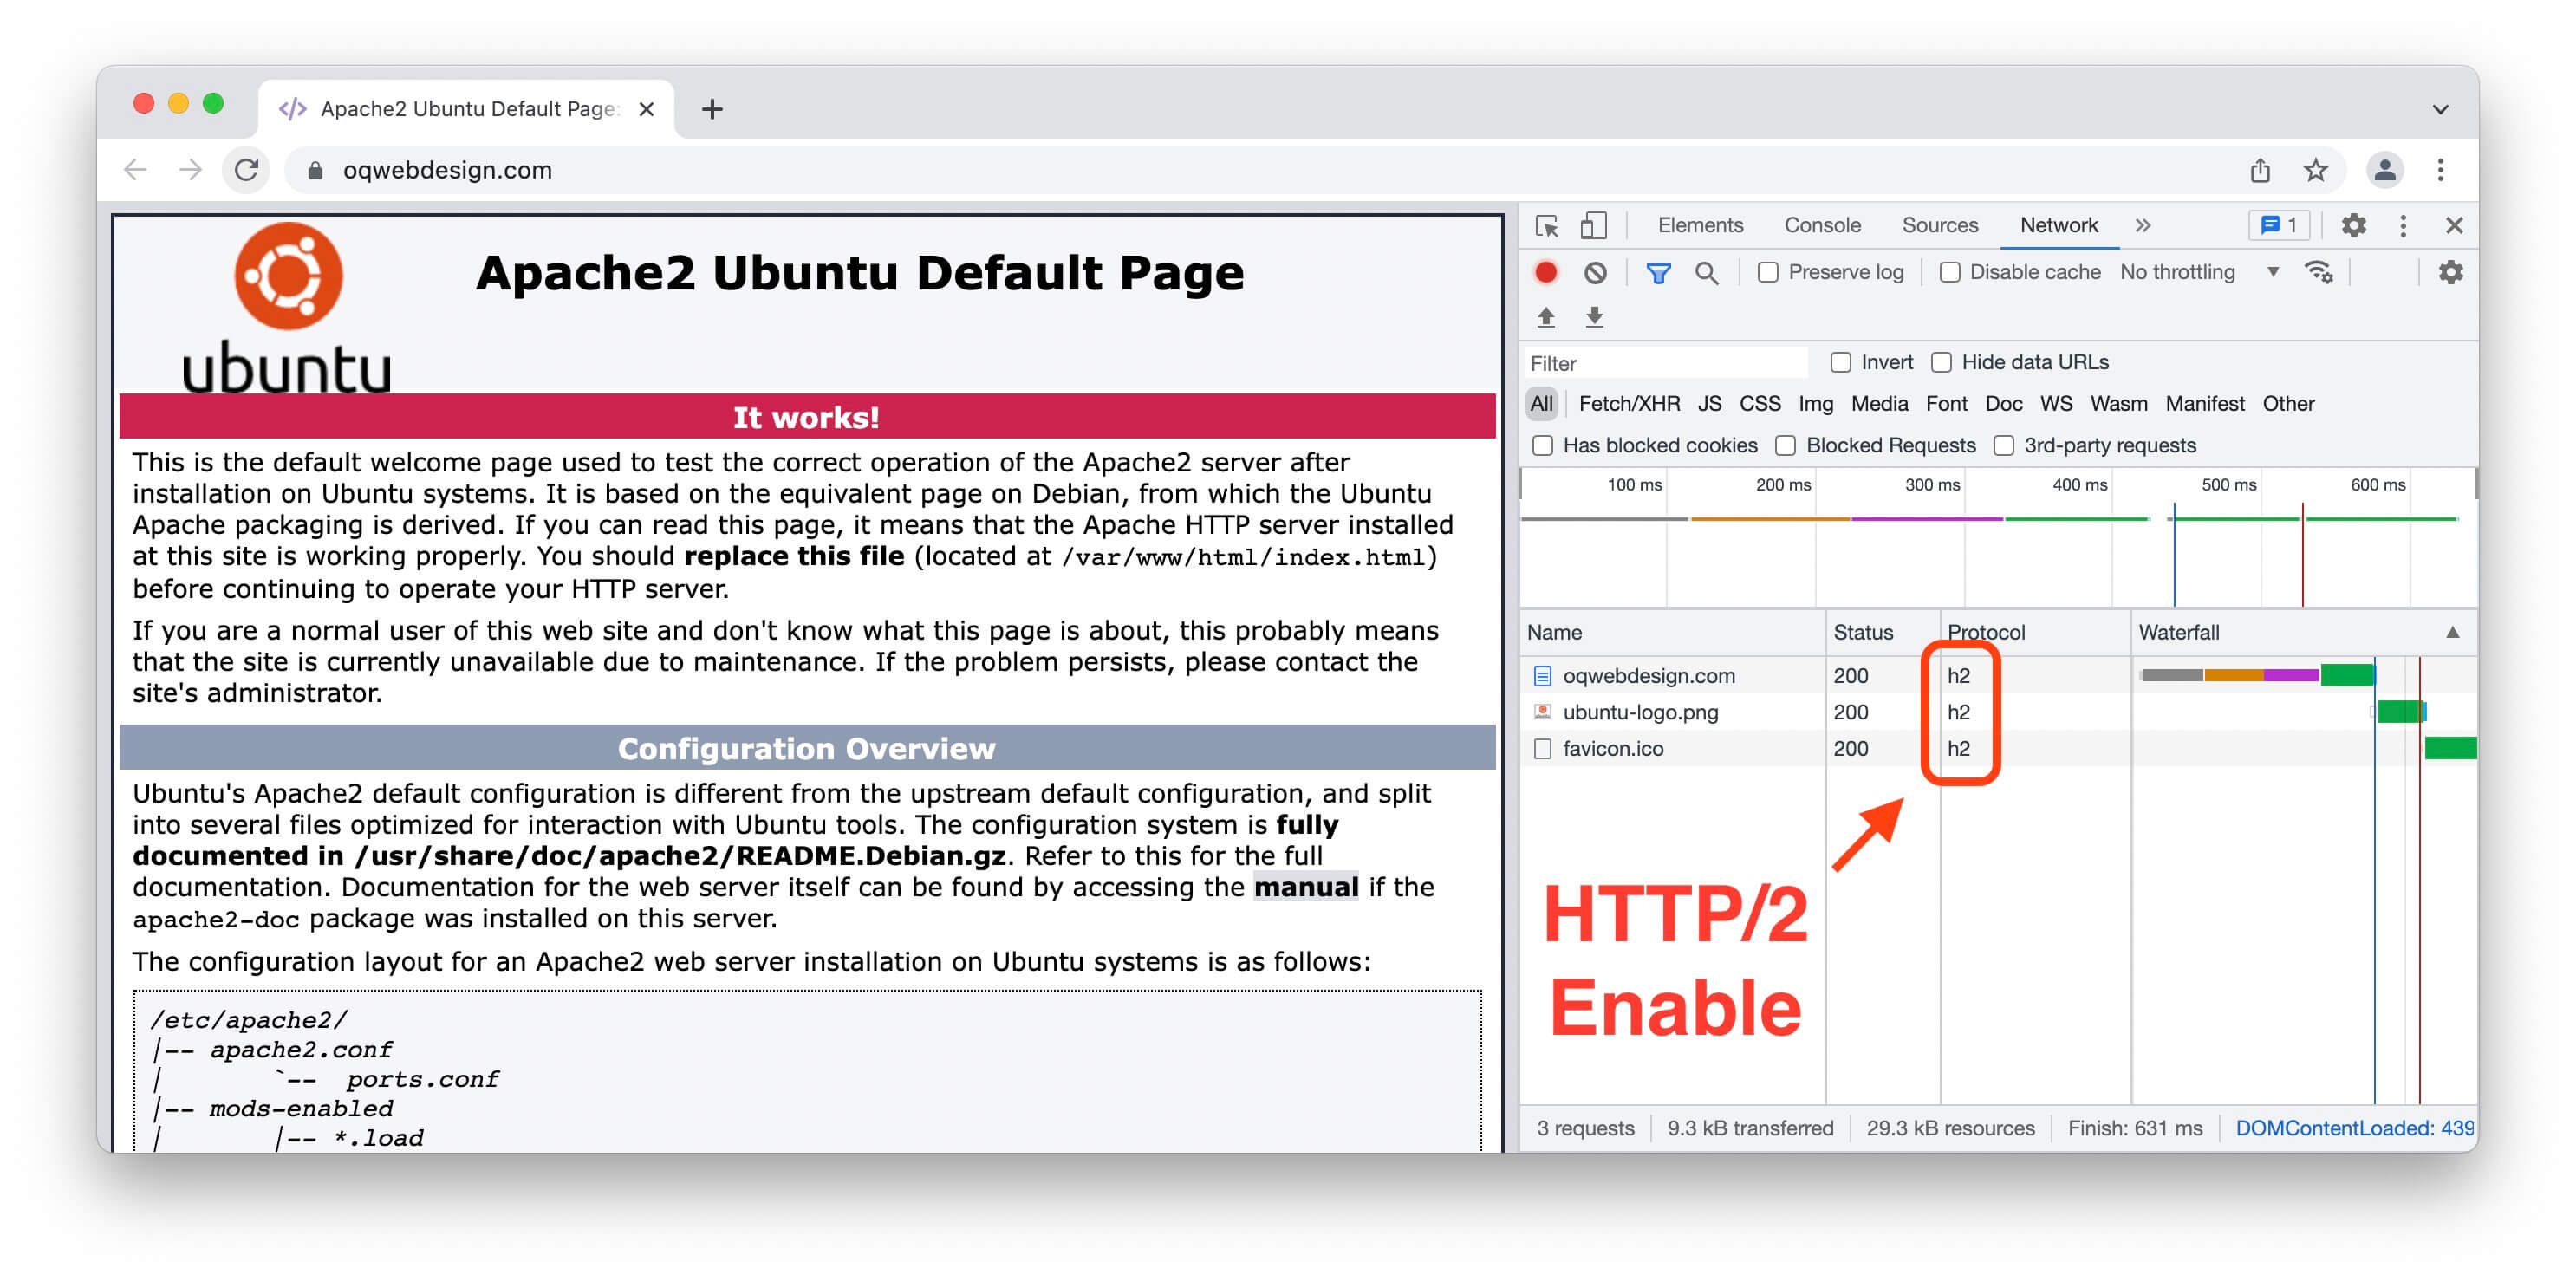
Now HTTP/2 should be enabled on your server. As shown on the image below.