How To Install PHP for Nginx on Ubuntu 20.04
February 7, 2022
Introduction
PHP is one of the most used server-side programming languages. Many popular content management system and frameworks such as WordPress, Magento, and Laravel are written in PHP. At the time of writing, the default Ubuntu 20.04 repositories include PHP 7.4 version. Before installing getting started, you should already have install Ubuntu on your instance and have install Nginx running as your web server.
Install and Configure PHP 7.4
Update all available repositories on your system and install the Nginx web server using the apt command below.
sudo apt update && sudo apt upgrade -y
In this step we will install and configure PHP 7.4. By default, the official Ubuntu 20.04 repository provides PHP 7.4 packages.
Install PHP 7.4 packages using the apt command below.
sudo apt install php-fpm php-common php-mysql php-xml php-curl php-gd php-imagick php-cli php-dev php-imap php-mbstring php-soap php-tokenizer php-json php-bcmath php-zip php-intl phpunit unzip
After entering this command, apt will tell you which packages it plans to install and how much disk space they’ll take up. Press Y and hit ENTER to confirm, and the installation will proceed.
Once the PHP is installed, verify the installed version with the following command:
php --version
You should get the following output:
PHP 7.4.3 (cli) (built: Nov 25 2021 23:16:22) ( NTS )
Copyright (c) The PHP Group
Zend Engine v3.4.0, Copyright (c) Zend Technologies
    with Zend OPcache v7.4.3, Copyright (c), by Zend Technologies
Configure Nginx to Process PHP Files
Next, you will need to configure Nginx to process PHP files.
To do so, we get to modify the Nginx virtual host configuration file with the following command, only if we are using the default host:
sudo nano /etc/nginx/sites-available/default
server {
    listen 80 default_server;
    listen [::]:80 default_server;

    root /var/www/html;
    index index.php index.html index.htm index.nginx-debian.html;
    server_name your_domain www.your_domain;

    location ~ \.php$ {
        include snippets/fastcgi-php.conf;
        fastcgi_pass unix:/var/run/php/php7.4-fpm.sock;
    }

    location / {
        try_files $uri $uri/ =404;
    }
}
Save and close using the CTRL + X combination, then press Y and confirm by pressing ENTER. Then, restart the Nginx server to apply the configuration.
Creating a PHP File to Test Configuration
You can test it to validate that Nginx can correctly hand .php files off to the PHP processor.
To do this, use your preferred text editor to create a test PHP file called info.php in your document root:
sudo nano /var/www/html/info.php
Enter the following lines into the new file. This is valid PHP code that will return information about your server:
<?php
phpinfo();
When you are finished, save and close the file.
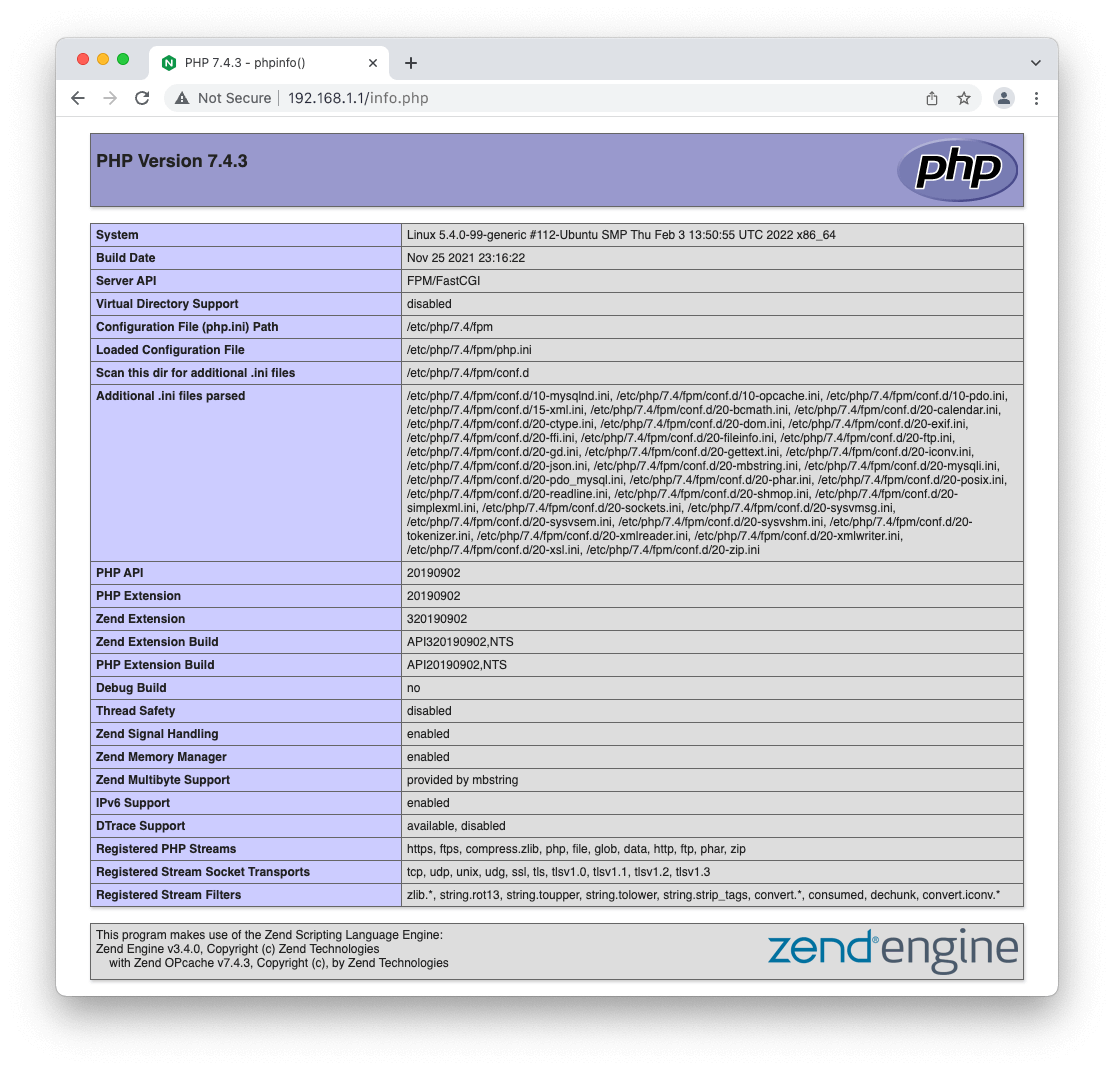
Now, you can visit this page in your web browser by visiting your server’s domain name or public IP address followed by /info.php:
http://your_server_domain_or_IP/info.php
Your browser will load a web page like the following that has been generated by PHP with information about your server:

If your page is as described, you’ve set up PHP processing with Nginx successfully.
After verifying that Nginx renders the page correctly, it’s best to remove the file you created as it can actually give unauthorized users some hints about your configuration that may help them try to break in. You can always regenerate this file if you need it later.
For now, remove the file:
sudo rm /var/www/html/info.php
That should do it!